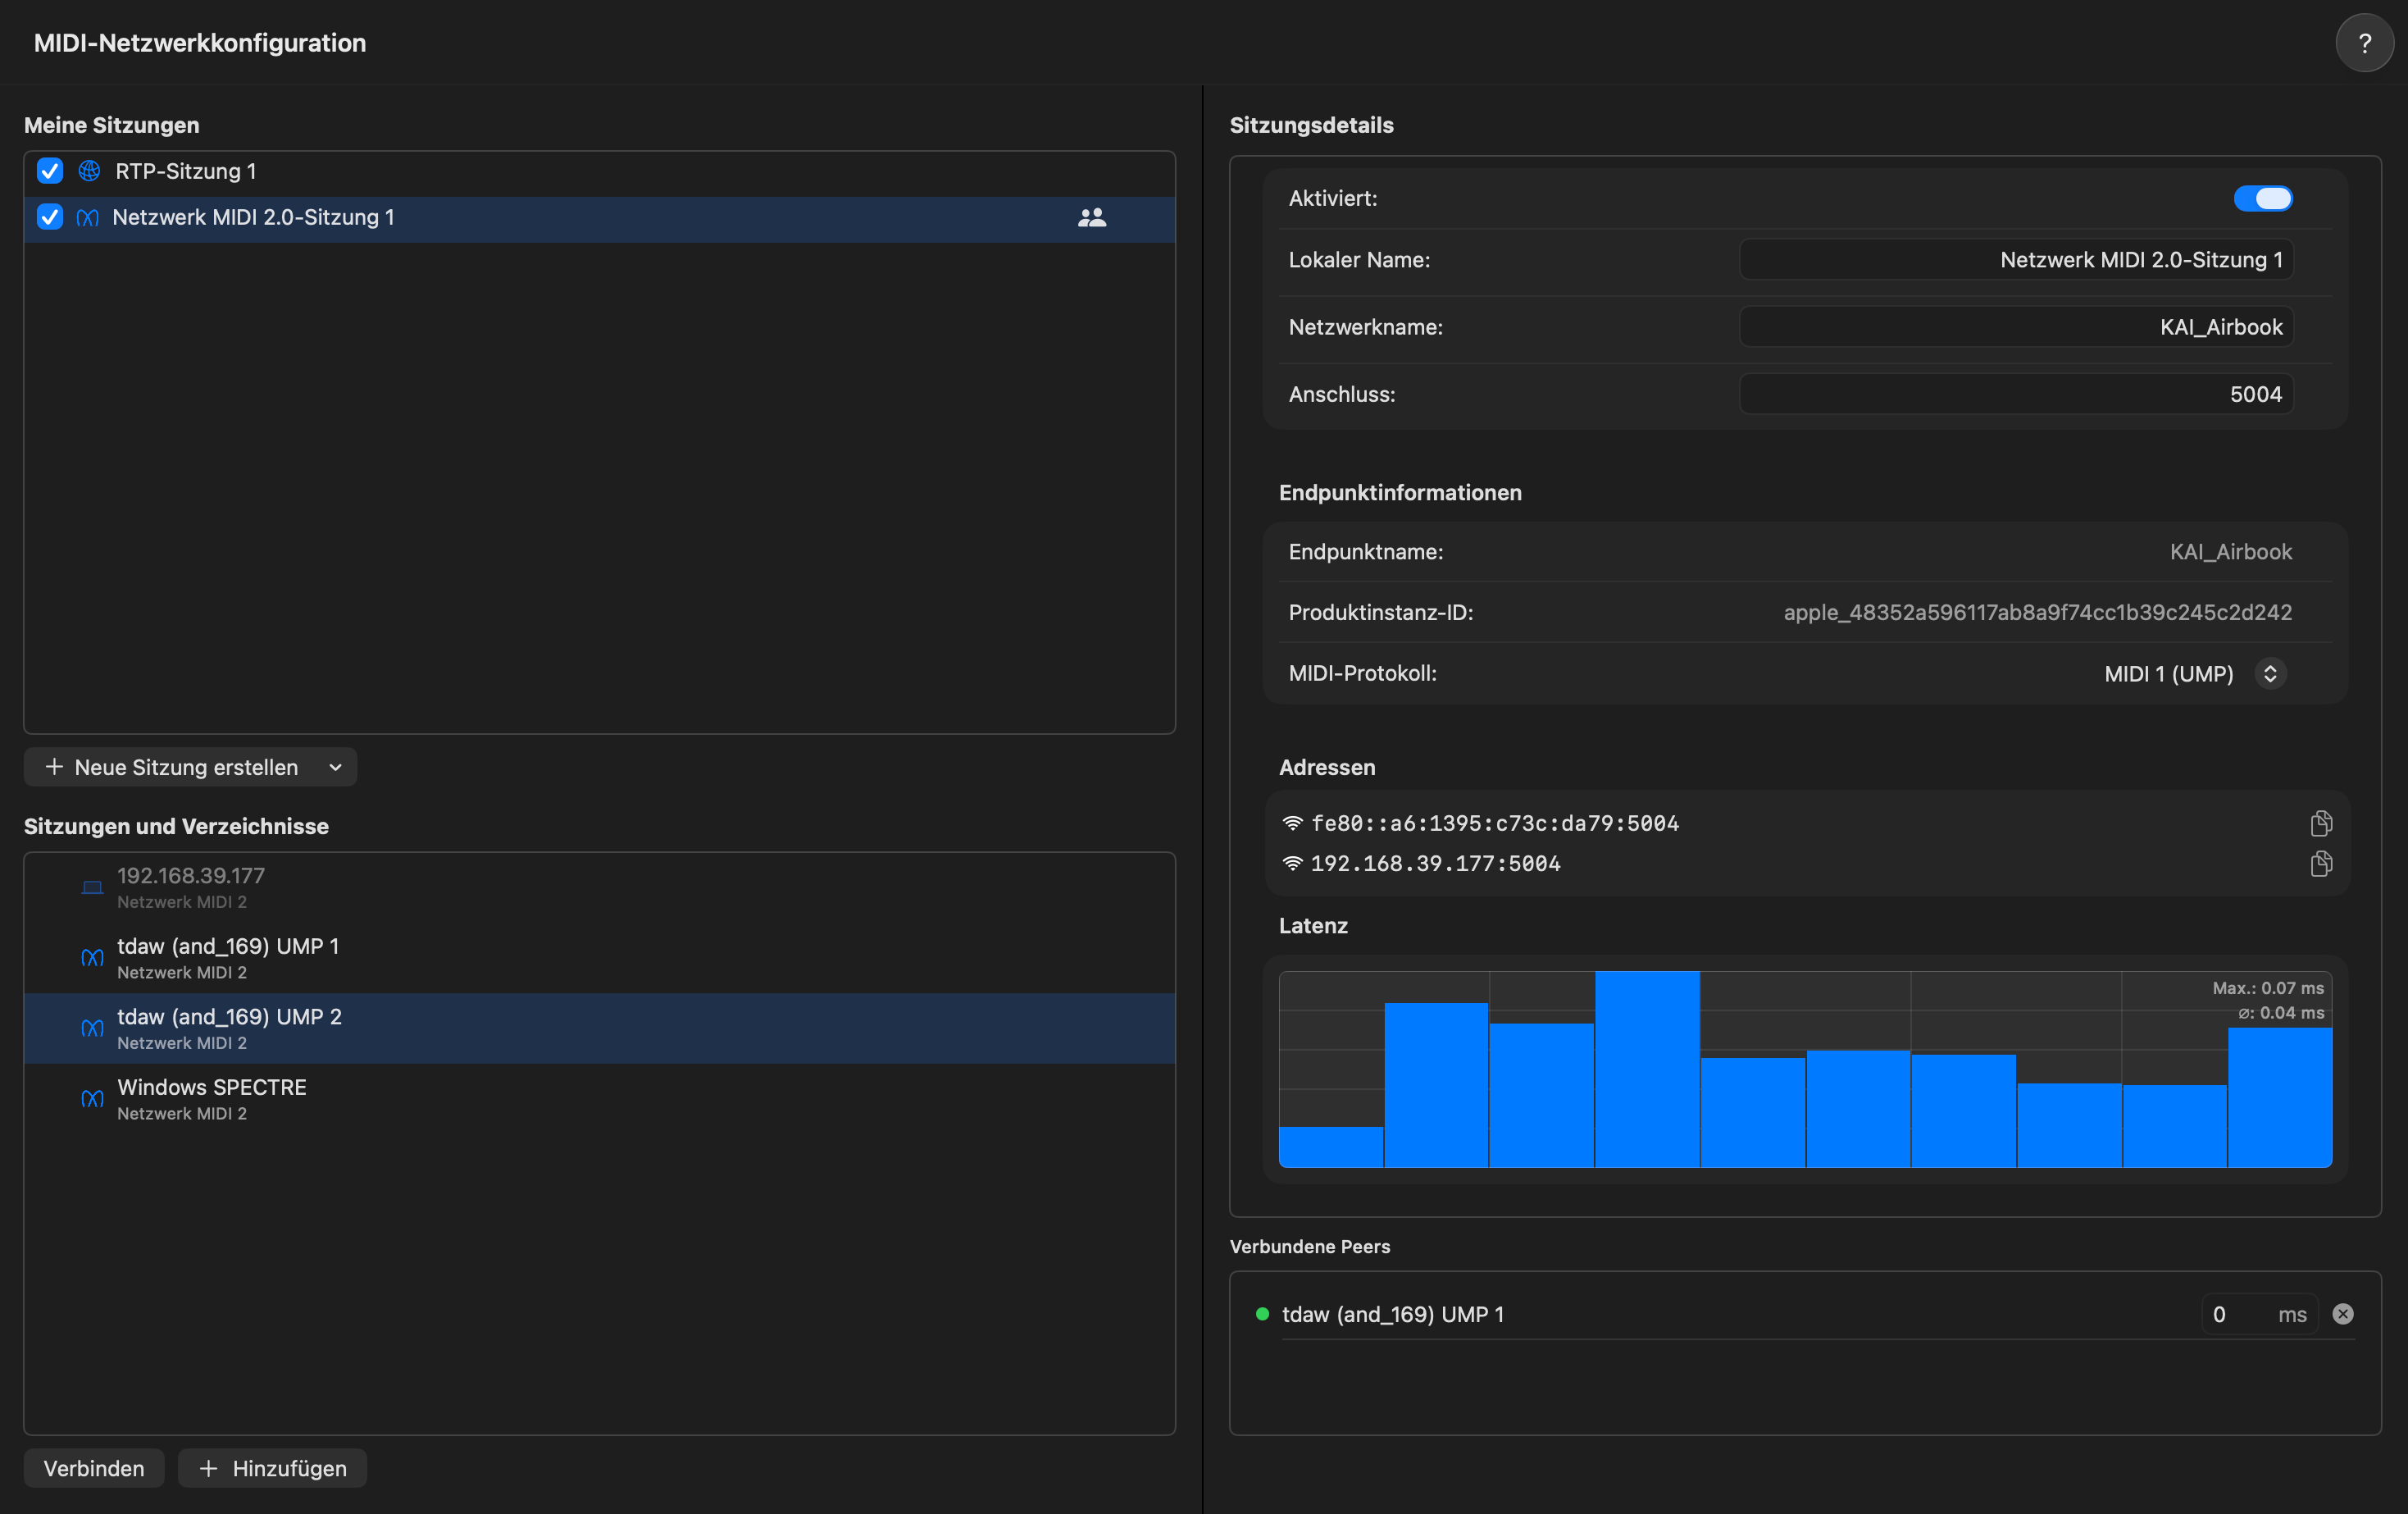
First things first: Understand the basic concepts... TouchDAW is two programs in one and uses a dedicated MIDI connection for each of them:
DAW Controller: MIDI Controllers: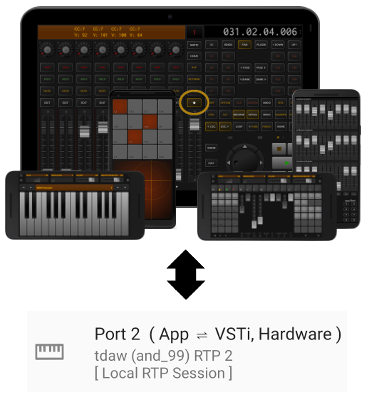
To make full simultaneous use of both parts you need to set up two MIDI connections and take care of properly routing them inside your DAW. Many FAQs and half-informed Play Store comments directly result from people assuming they know how a MIDI controller will work, while clearly not understanding these fundamentals.
MIDI connection setup
The following is all about WiFi. See the manual if you rather want to connect via USB or Bluetooth.
Note that TouchDAW 2.6 still defaults to RTP MIDI. With Network MIDI 2.0 support now starting to appear in operating systems this will eventually change in some future version.
Making network connections w/ TouchDAW's default settings ( WiFi / RTP / Local Session ) and:
Welcome to TouchDAW's 'horrible setup', originally designed by a large company from California in 2005.
- Make sure your device is connected to the same network that the DAW computer is connected to.
[ Network setup tips ]
- Windows: Download, install and open rtpMIDI.
Mac: Launch "Audio MIDI Setup" from "Applications/Utilities", make it show the 'MIDI Studio' and open the 'MIDI Network Configuration'
(Please refer to Apple's documentation for details. How 'MIDI Studio' and 'Network Configuration' are accessed keeps changing with every macOS version.)
- Create and enable two sessions in the resp. control panel. Name them how you like. 'Local name' sets the names of the virtual MIDI ports that will be created. 'Bonjour name' is what other peers on the network will see. For simplicity both local and bonjour names should be the same.
Screenshots: Windows - macOS. (For an up-to-date screenshot from macOS Tahoe 26.5 see the Network MIDI 2 tab)
- Restart the DAW if it was already running so it can pick up the new ports.
- Configure your DAW to use the MIDI ports corresponding to session 1 for remote control in- and output (These ports will have the 'Local name' that you assigned to session 1)
Find screenshots and further instructions for all supported DAWs here
- Start TouchDAW. Set the sequencer preference once you're at it (Setup / DAW Controller / Sequencer).
- See TouchDAW's two sessions appear in the directory listing. This happens automatically.
(Windows: When Bonjour is not installed, you may need to add things manually).
- Under "My Sessions" select the first session (1). In the "Directory" listing select "tdaw (and.XXX) RTP 1" (2) and press connect (3). The session moves to the "Participants" listing (4) and is now 'connected'.
- As for the first connection, select the second session (1), select "tdaw (and.XXX) RTP 2" (2) and press connect (3).
- In the DAW route session 2 to any synth, drum machine or other gadget you want to use with the MIDI controllers.
Only steps 8 and 9 need to be repeated on subsequent runs. Once you are familiar with the rtpMIDI / OS X control panels you can also set TouchDAW to autoconnect to the sessions you have created.
Some may prefer a video (YouTube link):
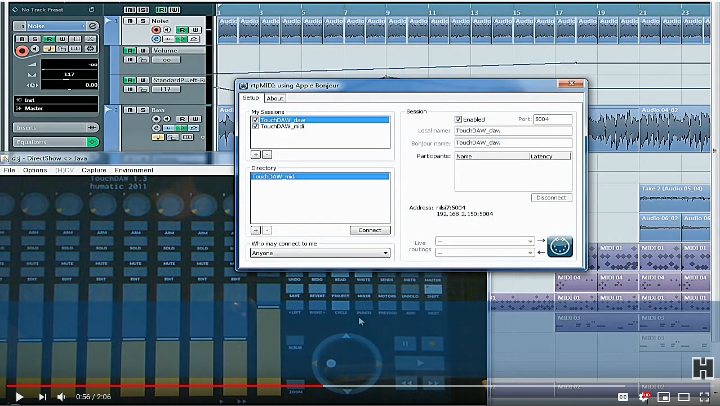
Not using an old Cubase version? The important thing here is to understand the principles. Setting up the MIDI driver is the same regardless of the DAW you are going to use it with. Setting up a Mackie controller is also pretty much the same with other DAWs, except that the program's windows may look a bit different. The DAW setup page contains more detailed instructions for all supported DAWs incl. screenshots and links to available video resources. It is also generally a good idea to make yourself familiar with what your DAW's manual has to say in terms of Mackie Control. Hints on where to find the various vendors' remote control docs are also given on said DAW setup page.
Sidenotes
It has not escaped my attention that the whole session / participant thing appears to be everything from "simple" via "not overly easy" and "fiddly" to "absolutely impossible to set up" to people and I agree: This is not the most intuitive way of plugging in a MIDI cable (Four MIDI cables here to be exact). However, if you look back for a second, you will realize that you did not have to do anything in the app itself and all the complexity results from Apple's 15 years old and well established MIDI network concept which rtpMIDI replicates 1:1. TouchDAW is about working with standards and this is the most common (free) standard available. Once you get used to it, you will probably realize that it was only as complicated as you might have made it.
Find information on other connection methods in the manual.
See FAQs / Troubleshooting should you run into problems.
mnet is an alternative to rtpMIDI. You do NOT need it in parallel!
- Make sure your device is connected to the same network that the DAW computer is connected to.
[ Network setup tips ]
- Download and install mnet / MIDIHub
- Start the DAW (this will load the mnet driver)
- Start TouchDAW. Set the sequencer preference in the app (Setup / DAW Controller / Sequencer) once you're at it.
- TouchDAW will autoconnect its two MIDI sessions to mnet's MIDI ports 1 & 2
(Autoconnecting will only happen if nothing is patched to these ports so far. This should be the case right after installation)
- Set up your DAW to use "MIDIHub Port 1" for Mackie Control in- and output.
Find screenshots and instructions for all supported DAWs here
- Use "MIDIHub Port 2" as an input for the keyboard, XY controllers etc.
mnet and TouchDAW will recreate the connections on subsequent runs. Depending on who comes online at what time reconnects may take up to 15 seconds.
To use other connection methods, connect more devices, change MIDI ports etc, use the driver's control panel - named MIDIHub - which is at Program Files (x86)/np/MIDIHub.
More information in the mnet manual...
The latest macOS versions (26.4+) now contain Network MIDI 2 functionality. On Windows this is available as a developer option.
Both implementations are labelled as 'preview' and at least the Windows one is not stable so far. Here is how to set things up nevertheless:
With all operating systems:
- Make sure your Android device is connected to the same network as the DAW computer and set at least one of TouchDAW's MIDI ports to Network / UMP.
macOS
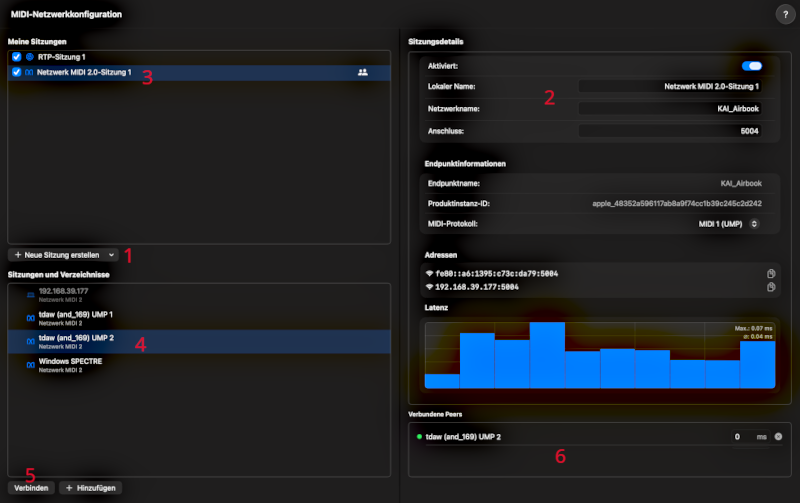
Apple's control panel now combines the old RTP-MIDI and the new Network MIDI 2 setups and mostly handles both in identical fashion. The panel itself became a lot larger, but in principle
is still much the same as the old MIDI Network one. The main difference is that you now will see 'sessions' for both protocols in the same window and can decide which protocol to use when creating a new 'session'.
- Create and enable a Network MIDI 2 session using the dropdown at center / left (1) and name it as you like on the right hand side (2). 'Local name' sets the name of the virtual MIDI ports that will be created on your Mac. 'Network name' is what other peers on the network will see. For simplicity both names can be the same.
Under 'Endpoint Information' you can optionally set the 'preferred' MIDI version for the session. At the time being this defaults to MIDI 1.0 because there won't be many programs that could handle MIDI 2.0.
- TouchDAW's UMP session should now appear in the directory listing on the lower left.
- Under 'My Sessions' select your Network MIDI 2 session (3), then select TouchDAW's session in the 'Sessions and Directories' listing (4) and click the 'Connect' button (5). The TouchDAW entry will then appear in the participants listing on the lower right hand side (6) and is now 'connected'.
- With a 'Network MIDI 2' session created as described above, you can alternatively connect to it from the app's side. To do so select the indented entry of your session in TouchDAW's MIDI port settings under 'UMP'. This will also make the app auto-connect on subsequent launches.
Windows
A Network MIDI 2 plugin for Microsoft's new MIDI stack is available as a preview from their GitHub. This is labelled as 'Alpha / Preview', requires developer mode, a release candidate 'Settings' app, firewall tweaks etc. and has a bunch of bugs and issues. Only install it if you are fine with beta software, occassional service crashes etc.!
- In the 'Windows Musician Settings' app select "Network MIDI 2.0' on the left hand side.

- With TouchDAW running on at least one UMP port, its session(s) should be listed in the main window:
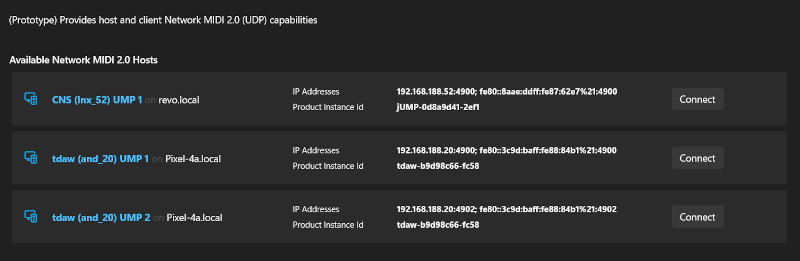
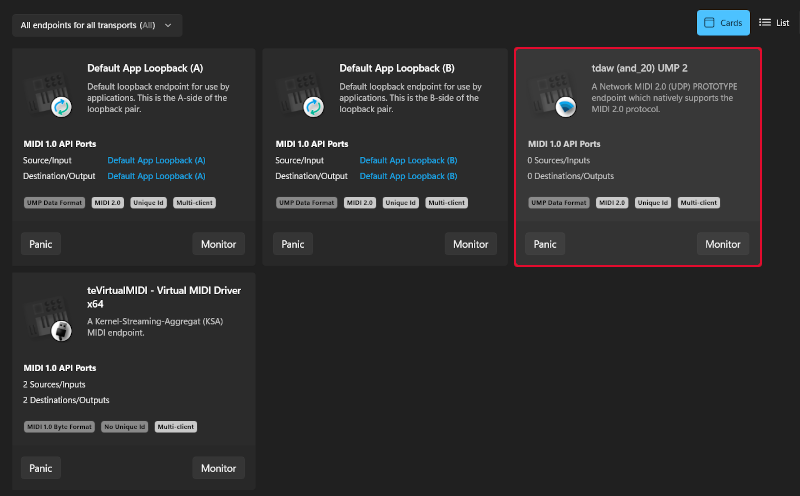
- Click the 'Connect' button on the session you want to connect and it should appear on the 'MIDI Devices And Endpoints' page and be operational.
Note that 'Disconnect' will sometimes work, but often does nothing except from crashing the MIDI service a couple of seconds later.
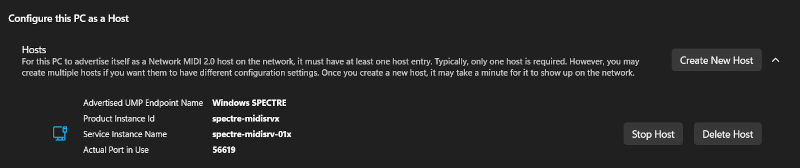
- Alternatively you can configure the PC to act as a host on the 'Network MIDI 2.0' page and connect to it from the app. In TouchDAW's MIDI setup select 'Network' and the indented entry under 'UMP' that
says 'Windows COMPUTERNAME'. Note that Windows will use a random port number for host sessions (the 'fixed' option in the 'Advanced' settings does nothing). Automatic reconnects will not work, because the PC will appear as a different session to TouchDAW the next time around.
Please report any issues you may have with this to Microsoft's GitHub.
|
 rtpMIDI / macOS MIDI Network
 Network MIDI 2